The CH341A driver is essential for communicating with hardware like USB-to-serial converters, EEPROM programmers, and I2C adapters. Whether you’re working on electronics projects or repairing devices, this guide will help you install the driver correctly while avoiding common pitfalls.
1. What is the CH341A Driver?
The CH341A driver enables communication between your computer and CH341A-based hardware, such as:
- USB-to-Serial/TTL converters
- EEPROM/Flash memory programmers
- I2C/SPI interface tools
Without this driver, your operating system won’t recognize connected CH341A devices.
2. Pre-Installation Checklist
A. Verify Current Installation
- Press Windows + X and select Device Manager.
- Expand Ports (COM & LPT) or Other Devices.
- Look for “CH341A” or an unrecognized device (yellow exclamation mark).
- If detected, right-click it and select Update driver.
- If not, proceed to download.
B. System Requirements
- OS: Windows 7/8/10/11 (32-bit or 64-bit).
- Permissions: Administrator access.
C. Safety Tips
- Disable antivirus temporarily during installation (re-enable afterward).
- Download drivers only from trusted sources (see Section 3).
3. Downloading the CH341A Driver
- CH341a_3.9_2024-10-16 – Download
Process:
- Click the Download link above.
- Click CH341SER.EXE (for Windows).
- Save the file to your Downloads folder.
4. Step-by-Step Installation Guide (Windows 10/11)**
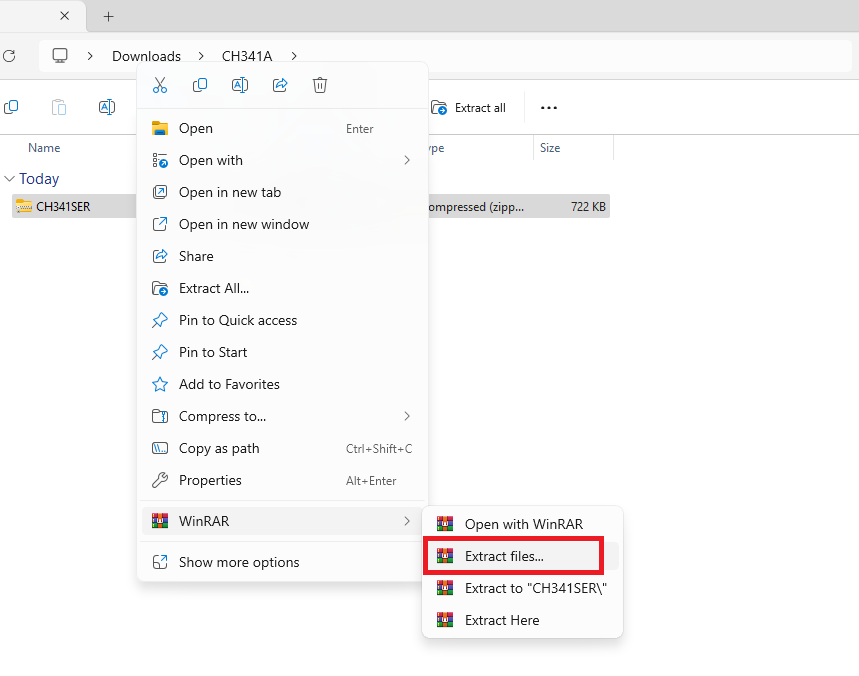
Step 1: Extract the Driver
- Right-click the downloaded ZIP file and select Extract Files.
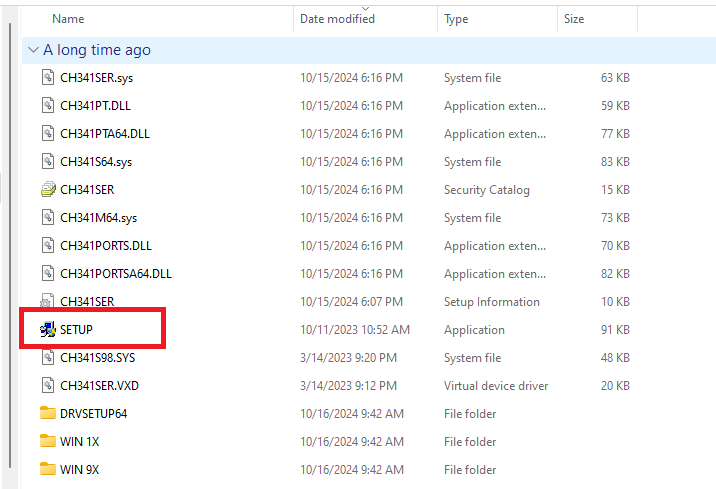
Step 2: Run the Installer
- Open the extracted folder.
- Double-click SETUP.exe
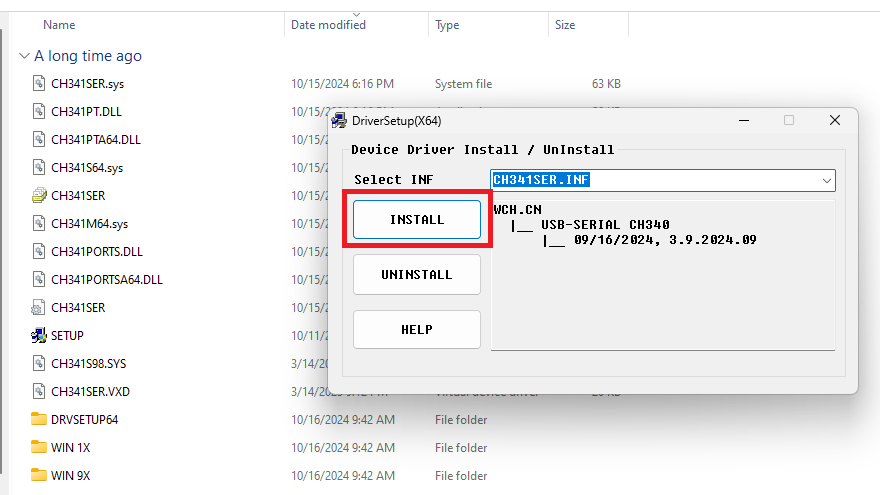
Step 3: Follow Installation Prompts
- Click Install and wait for the process to complete.
- If prompted by Windows Security, select Install anyway (the driver is unsigned but safe).
Step 4: Connect Your Device
- Plug your CH341A hardware into a USB port.
- Windows will automatically recognize it.
Step 5: Verify Installation
- Return to Device Manager → Ports (COM & LPT).
- Confirm “USB-SERIAL CH341” appears with a COM port number (e.g., COM3).
5. Troubleshooting Common Issues
Issue 1: “Driver Not Detected”
- Solution: Manually install via Device Manager:
- Right-click the unrecognized device → Update driver.
- Select Browse my computer → Navigate to the extracted driver folder.
Issue 2: “Driver Unsigned” Error
- Solution: Temporarily disable Secure Boot in BIOS/UEFI settings.
Issue 3: COM Port Not Visible
- Solution: Try a different USB cable or port.
Issue 4: Antivirus Blocking Installation
- Solution: Add the driver folder to your antivirus exclusion list instead of disabling protection.
6. FAQs
Q1: Is the CH341A driver compatible with macOS/Linux?
- Linux: Often supported natively. Use
lsusbto check detection. - macOS: Requires third-party tools like CH340/CH341 Drivers.
Q2: How to uninstall the driver?
- Go to Control Panel → Uninstall a program → Select “CH341SER” → Click Uninstall.
Q3: Why does my device still not work after installation?
- Faulty hardware or incorrect driver version. Test the device on another PC.
7. Additional Resources
- WCH Official CH341A Documentation – (Translate to English)
Conclusion
Installing the CH341A driver is straightforward when using trusted sources and following these steps. For further assistance, share your issue in the comments below, and our community will help troubleshoot!
If you still have a query or any confusion, please use the comment section below to tell us, I will be glad to help you!